Currency conversions are for reference only. Payments are processed in Euro (€), the store’s official currency, and the checkout page will display prices only in Euro (€). The final amount in your currency may vary depending on the exchange rate applied by your bank or credit card provider.
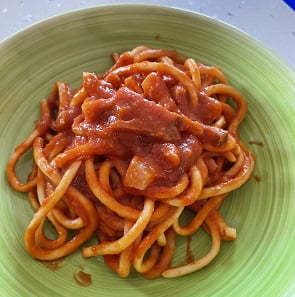
Cooking: Fry bacon strips until crispy, then use the fat to cook tomato sauce for 1 hour. Add cheese and guanciale, stir until cheese melts. Combine cooked pasta with sauce, top with more cheese and pepper.
Sharing: Try the recipe and share your results on our social media (Instagram or Facebook).
Note: Different pasta shapes may require varying hydration levels. Follow the provided instructions and reach out to our customer service for any queries.
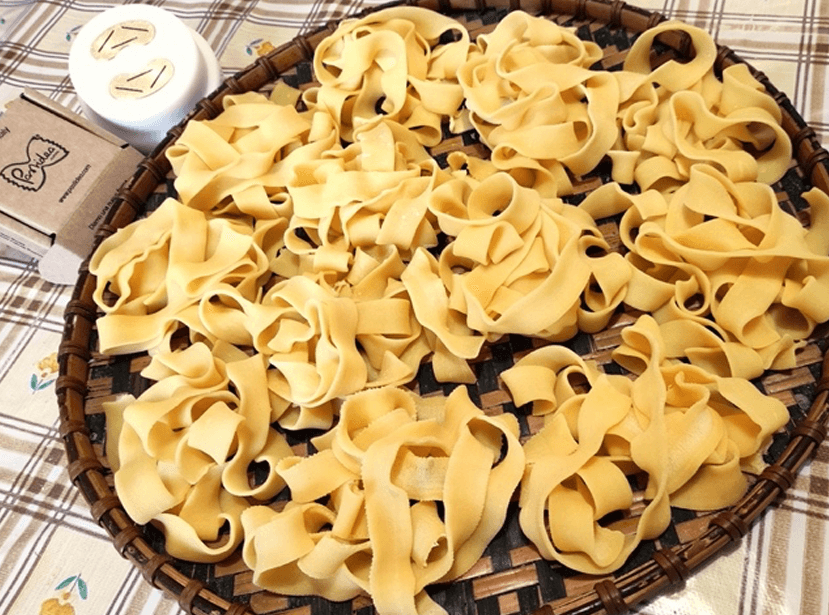
🍽️Pappardelle 15 mm Recipe For Philips Pasta Maker Avance
📝 Ingredients
400 g re-milled semolina flour (any brand)
🥚 2 whole eggs
💧 Water + 5 ml extra virgin olive oil Total liquid: 160 ml (including eggs and oil)
⚙️ Preparation
🧩 Setup Insert the chosen die (horizontal suggested) and attach it to the machine.
🔁 Mixing Start the program and slowly pour in the well-mixed liquids.
⏱️ Manual Re-mixing At the extrusion beep:
Turn off the machine
Turn it back on
Hold down the start button for a few seconds
Repeat for a total of 3 mixings
🌀 Extrusion Return the first pappardelle to the mixing chamber if not smooth. Continue until the result is silky and even.
✂️ Cutting Cut to your preferred length (long is recommended) and lay on a drying rack or clean cloth.
🍝Shaped Pasta Die Recipe – Philips Pasta Maker
📝 Ingredients:
420 g of re-milled semolina (any brand you prefer)
💧 160 ml of total liquid, including: 🫒 5 ml extra virgin olive oil water up to the total
⚙️ Preparation:
🔧 Attach the shaped pasta die to the machine.
Pour the semolina into the mixing chamber.
▶️ Start the program, pouring the mixed liquids slowly.
🔁 Knead 3 times:
At the extrusion beep, turn off the machine.
Turn it back on and hold the start button for a few seconds to restart kneading.
Repeat until you’ve completed 3 kneading cycles.
Extrude the pasta.
❌ Discard the first batch (usually imperfect) and put it back in the bowl.
✂️ Cut the pasta (not too thin).
Place on a drying rack or tray.
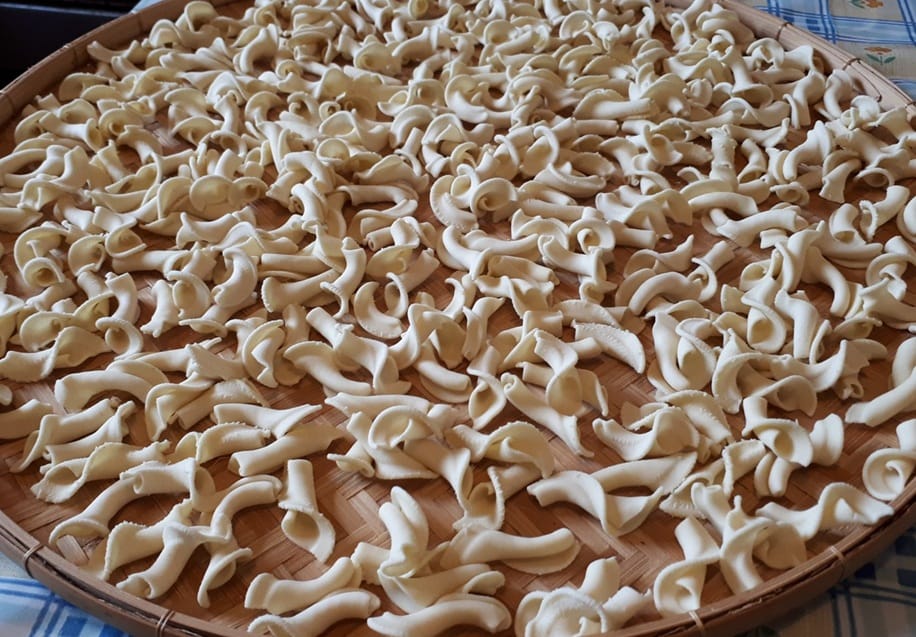
🍝Lasagna Recipe for Philips Pasta Maker Avance
Available shapes: 🔹 Smooth Lasagna 🔸 Curly Lasagna
📝 Ingredients for 4 servings
Shape
Semolina Type
Eggs
Total Liquid
Smooth Lasagna
500 g semolina (regular or re-milled)
🥚 4 eggs + water + 🫒 oil
210 ml total (including 10 ml oil)
Curly Lasagna
500 g semolina (preferably not re-milled, but re-milled is okay)
🥚 2 large or 3 medium eggs + water + 🫒 oil
190 ml total (including 5 ml oil)
⚙️ Preparation (same for both types)
Insert the lasagna disc for your chosen format (smooth or curly).
Pour the semolina into the chamber.
▶️ Start the program, slowly adding the pre-mixed liquid ingredients.
🔁 Knead 2–3 times:
At the extrusion beep, turn off the machine.
Turn it back on and hold the start button for a few seconds to resume kneading.
Repeat until 3 kneading cycles are completed.
If needed, break and return the first sheets to the bowl if they’re too dry (especially for smooth lasagna).
✂️ Cut the sheets to your preferred length.
Place them on a tray or drying rack and set aside.
🍝 Recipe for Calla for Philips Pasta Maker Avance
📝 Ingredients
For the dough:
400 g of semolina flour (fine or coarse, any brand you like)
💧 150 ml of water, including:
🫒 10 ml of extra virgin olive oil
🛠️ Preparation
⚙️ Attach the "Calla" die to the machine.
Add the semolina to the mixing chamber.
▶️ Start the program.
🫙 Slowly pour in the liquids while the machine is mixing.
Extrude until all the dough is used up.
🔁 Double mixing (recommended for Avance Collection)
⏰ At the extrusion beep, unplug the machine.
Plug it back in.
🔄 Hold the start button for a few seconds to begin the second mixing cycle.
✂️ Cutting and drying
🍝 Cut the pasta to your preferred length
Place the pasta on a drying rack until ready to cook.
Final tip: Let the pasta dry slightly before cooking for a firmer texture.
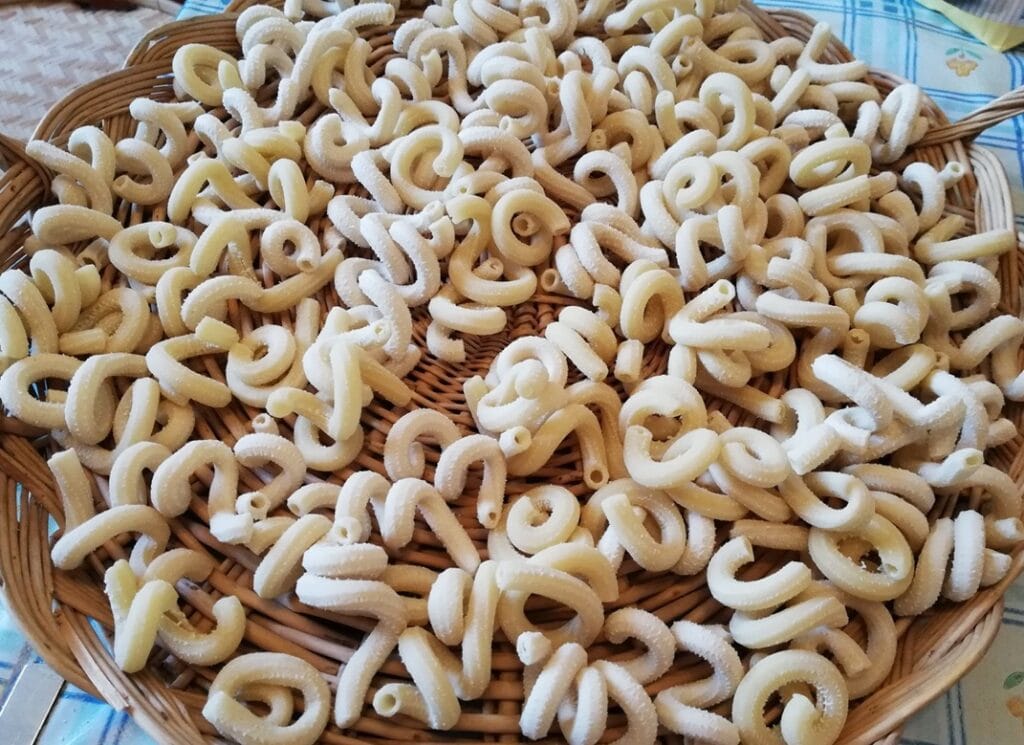
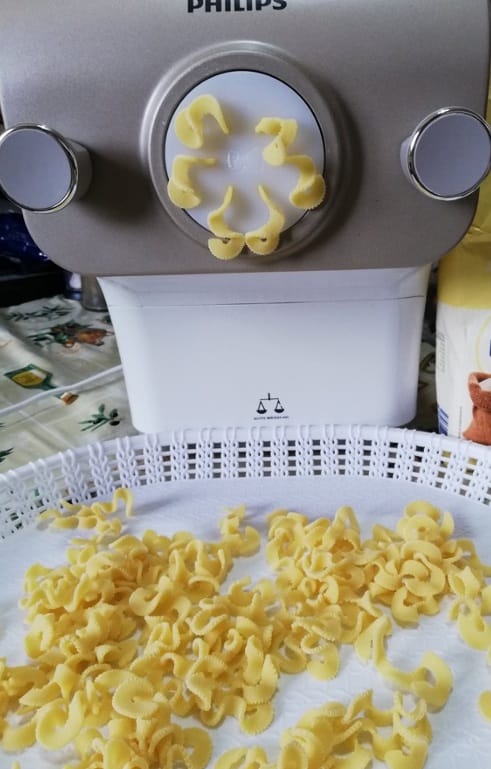
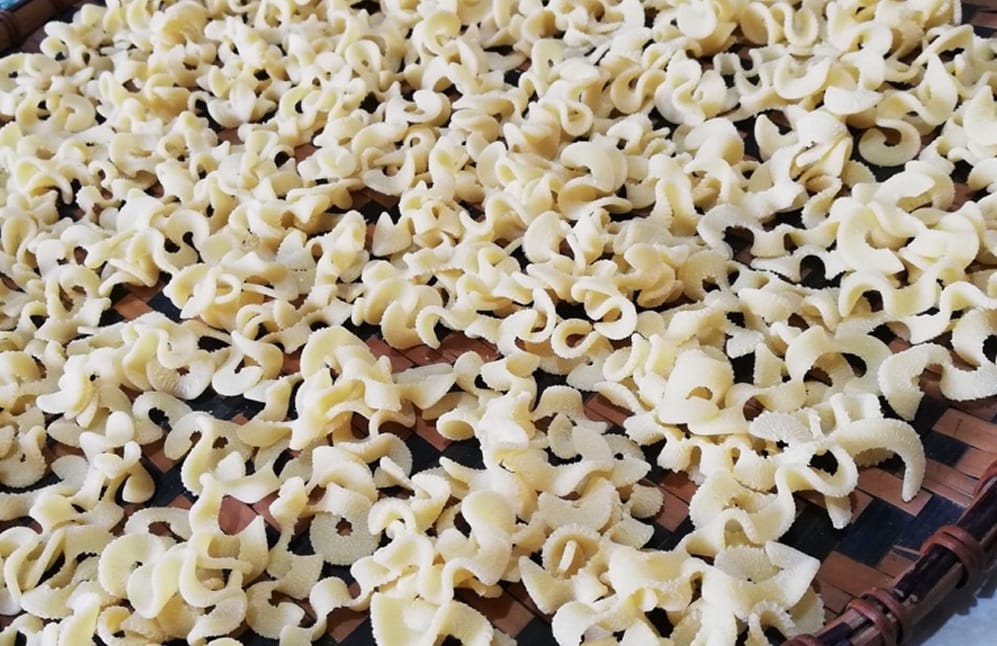
🍝 Recipe for Cellentani for Philips Pasta Maker Avance
📝 Ingredients
For the dough:
400 g of semolina flour (fine or coarse, any brand you prefer)
💧 160 ml of water, including:
🫒 10 ml of extra virgin olive oil
🔺 Tip: Use slightly more water than what the machine usually recommends to ensure smoother extrusion.
🛠️ Preparation
⚙️ Mount the cellentani die on the machine.
Pour the semolina into the mixing chamber.
▶️ Start the program.
🫙 Slowly pour in the liquids while the machine mixes.
🔁 Double mixing (recommended)
⏰ At the first extrusion beep, unplug the machine.
Plug it back in.
🔄 Hold the start button for a few seconds to trigger a second mixing cycle.
🍝 Extrusion and cutting
🥄 Gently assist the initial extrusion with the provided spatula.
Continue until all the dough is extruded.
Place the cellentani on a drying rack.
Final tip: Let the pasta dry slightly before cooking or storing for best results.
🍝 Recipe for Smooth/Ridged Pacchero or Smooth/Ridged Canestro with Philips Pasta Maker Avance
🧂 Ingredients for 4 servings
400 g of durum wheat semolina (re-milled or not, any brand you prefer)
170 ml of total liquids, including:
💧 water
🫒 10 ml of extra virgin olive oil
🛠️ Preparation
🔧 1. Die setup
Combine two die components:
the smooth pacchero top
and the ridged canestro base ➡️ This creates a custom die for a “Smooth Canestro”
Insert it into the Philips Pasta Maker Avance.
🥣 2. Dough preparation
Pour the semolina into the mixing container.
Start the machine and gradually add the liquids during kneading.
🔁 3. Second kneading cycle (for Avance users)
If using Philips Viva, a second cycle is not needed.
For Philips Avance:
When the extrusion beep sounds, turn off the machine
Turn it back on and hold the start button for a few seconds
Repeat to perform a second kneading cycle
🍝 4. Extrusion
The pasta is well-formed from the start, no need to reinsert the first pieces.
Continue extrusion until the dough is fully processed. ⚠️ May require multiple extrusion sessions.
✂️ 5. Cutting and drying
Cut the canestro or pacchero to your desired length. 👉 Longer cuts enhance the ridged base effect.
Place on a drying rack until ready to cook.
✅ Final Result
A versatile and elegant format, perfect for stuffing, baking, or pairing with rich sauces. The smooth/ridged combination offers aesthetics and functionality in every bite.
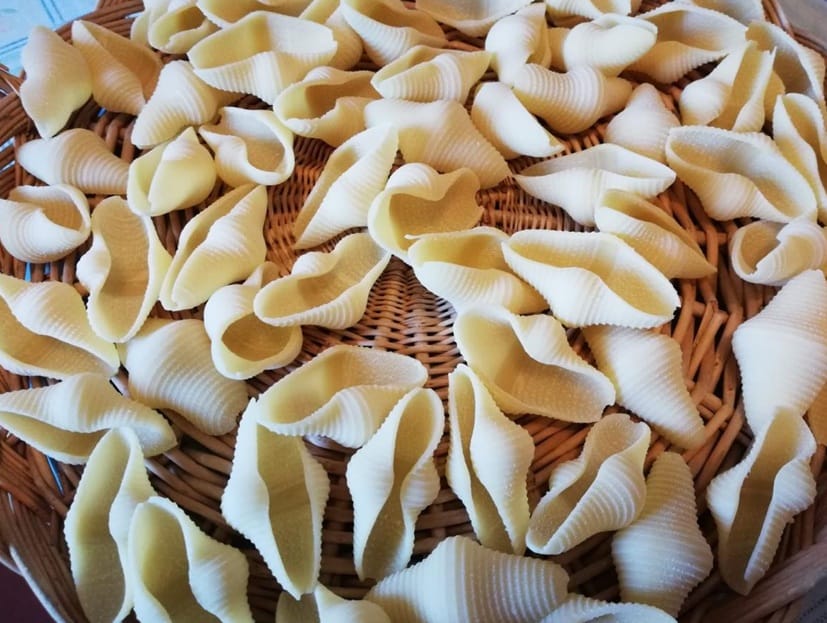
🐚 Giant Conchiglione Recipe (Smooth and Ridged) with Philips Pasta Maker Avance
🧂 Ingredients for Smooth Conchiglione
500 g of durum wheat semolina (re-milled or not)
190 ml of total liquid, including:
💧 water
🫒 10 ml extra virgin olive oil
🧂 Ingredients for Ridged Conchiglione
400 g of durum wheat semolina (re-milled or not, any brand)
160 ml of total liquid, including:
💧 water
🫒 10 ml extra virgin olive oil
🛠️ Preparation (for both types)
🔧 1. Attach the die Insert the smooth or ridged conchiglione die into your Philips Pasta Maker, depending on the desired shape.
🥣 2. Dough preparation
Pour the semolina into the mixing container.
Start the program and gradually add the liquids while the machine kneads.
🔁 3. Recommended kneading cycles
When the extrusion beep sounds, turn off the machine.
Turn it back on and hold the start button for a few seconds to restart kneading.
Repeat for at least 2 kneading cycles for a smooth and elastic dough.
🍝 4. Extrusion
The first shells might not come out perfectly: reinsert them into the container.
Continue extruding until the dough is finished.
🧺 5. Dry or use fresh
Lay the conchiglioni on a drying rack.
You can cook them fresh or dry them to store for later use.
✅ Result
Whether smooth or ridged, giant conchiglioni are ideal for stuffing and baking, or serving with rich and creamy sauces. 🎯 Two versions, guaranteed success!
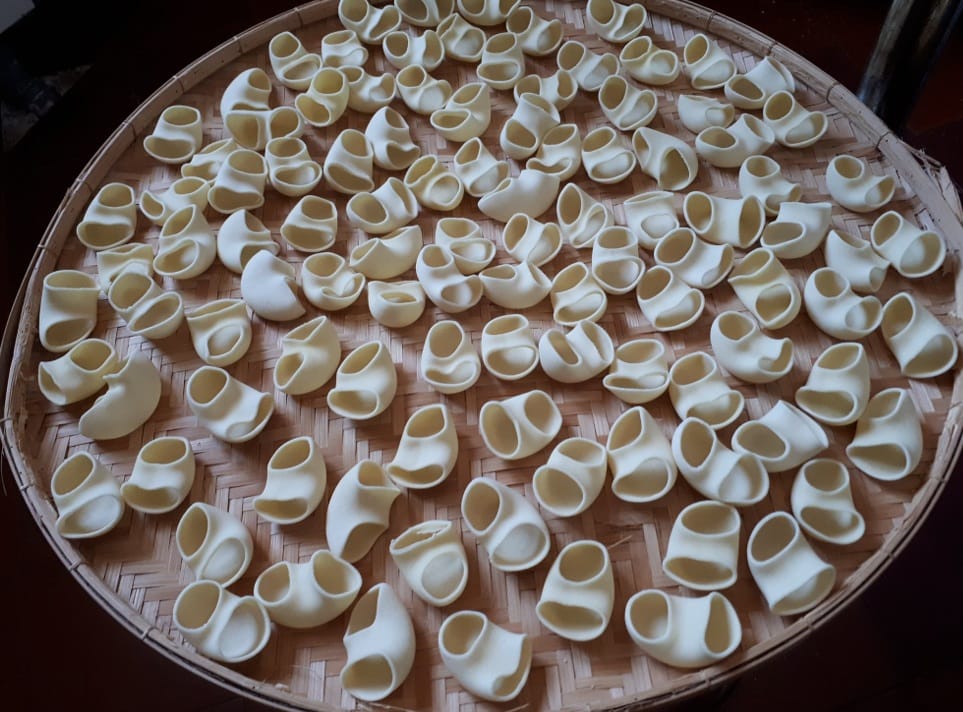
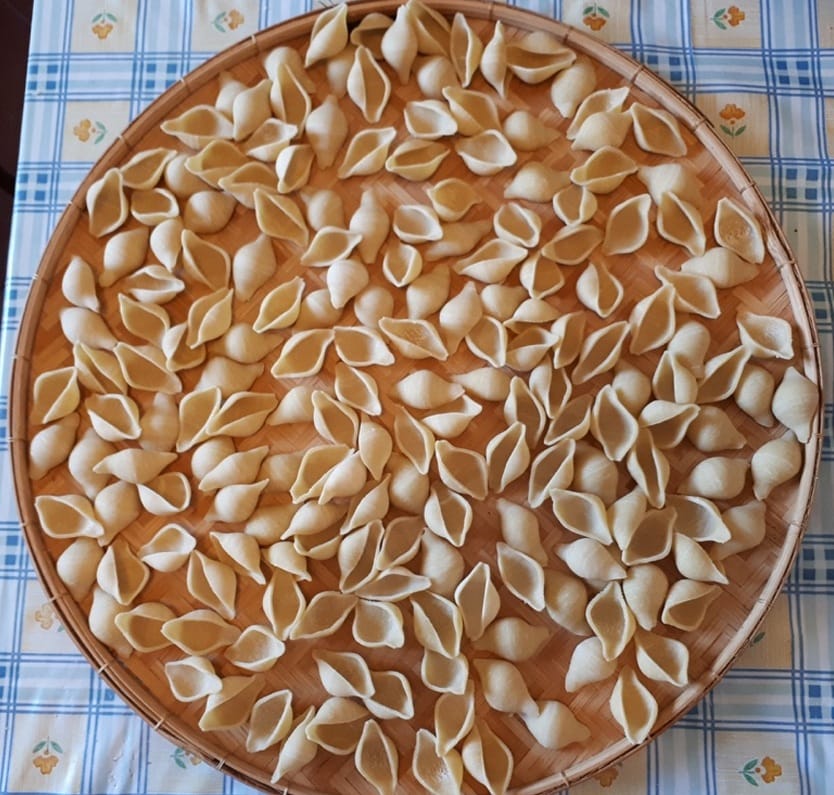
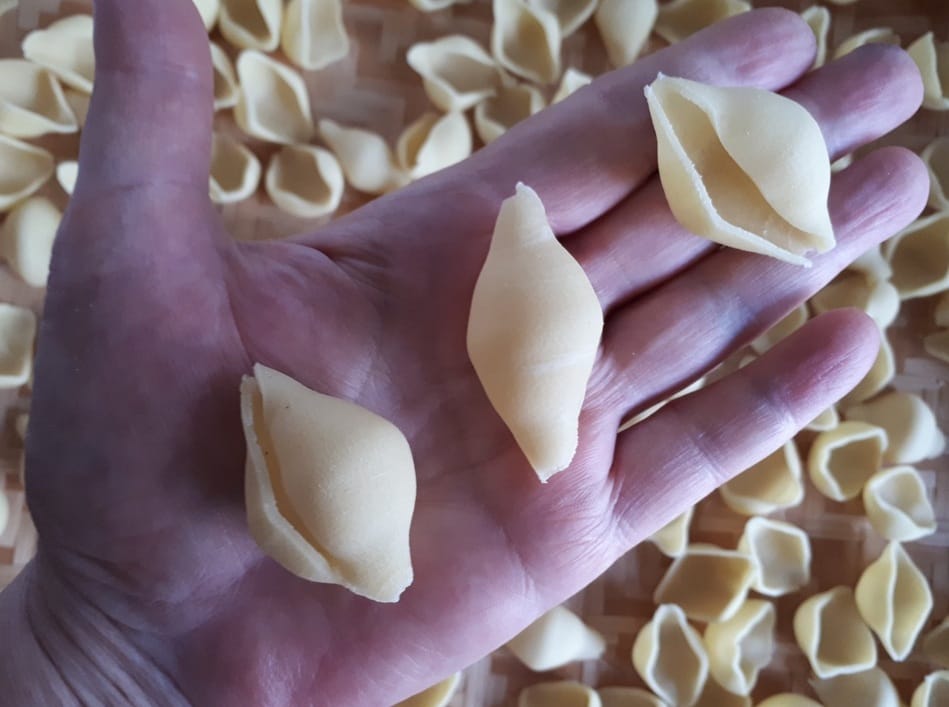
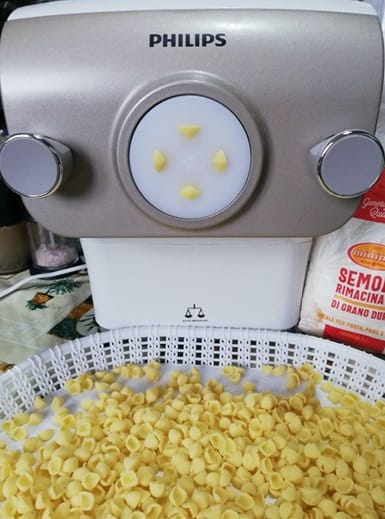
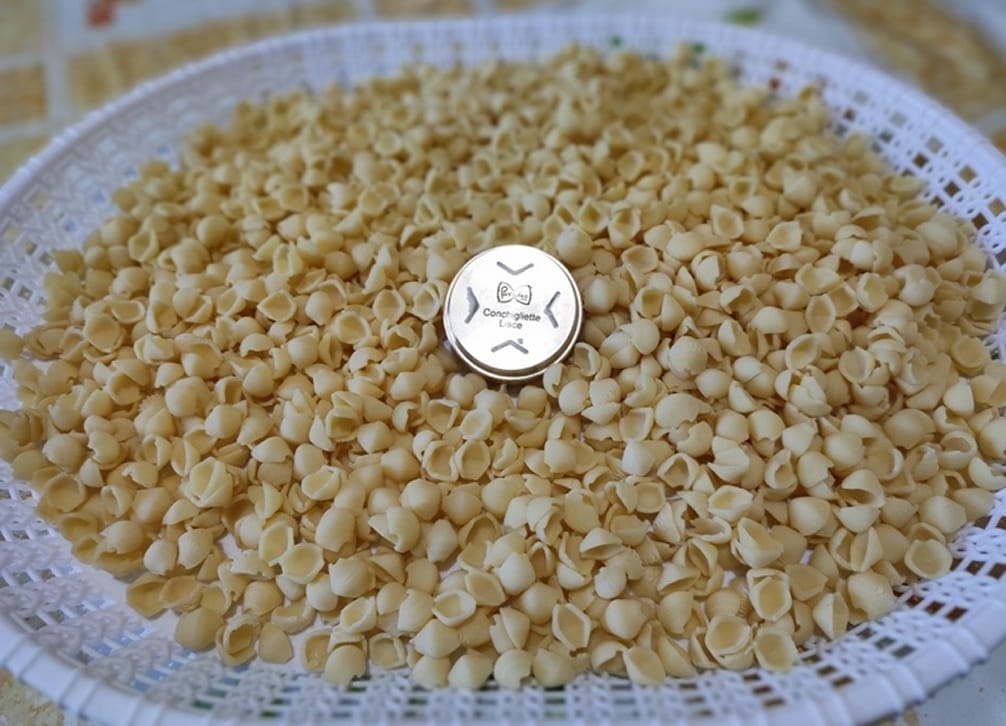
🐚 Smooth Conchigliette Recipe with Philips Pasta Maker Avance
🧂 Ingredients for 4 servings
315 g of durum wheat semolina (any brand)
125 ml total liquids, including:
💧 water as needed
🫒 5 ml of extra virgin olive oil
🛠️ Preparation
🔧 1. Attach the die
Insert the smooth conchigliette die with the dedicated adapter into the Philips Pasta Maker Avance.
🥣 2. Mixing the dough
Pour the semolina into the mixing container.
Start the program and gradually add the liquids (water + oil) as the machine kneads.
🔁 3. Extra kneading cycle
When the extrusion beep sounds, turn off the machine.
Turn it back on and hold the start button for a few seconds to restart the kneading cycle.
🍝 4. Extrusion
If the first conchigliette are not smooth, put them back into the container.
Continue until the dough extrudes smooth and consistent.
✂️ 5. Cutting and drying
Extrude until the dough is finished.
Place the conchigliette on a drying rack, spaced apart.
✅ Final result Perfectly shaped smooth conchigliette, ideal for soups, light sauces, or baked pasta dishes. Also great for drying and storing.
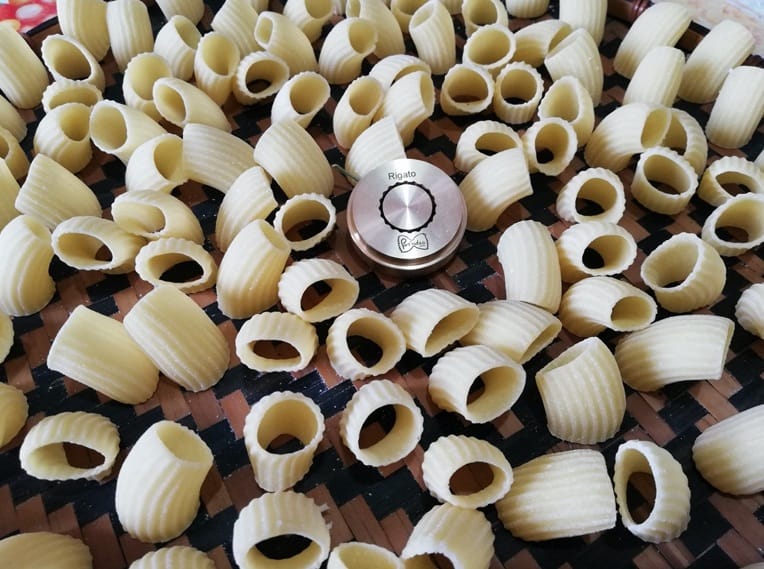
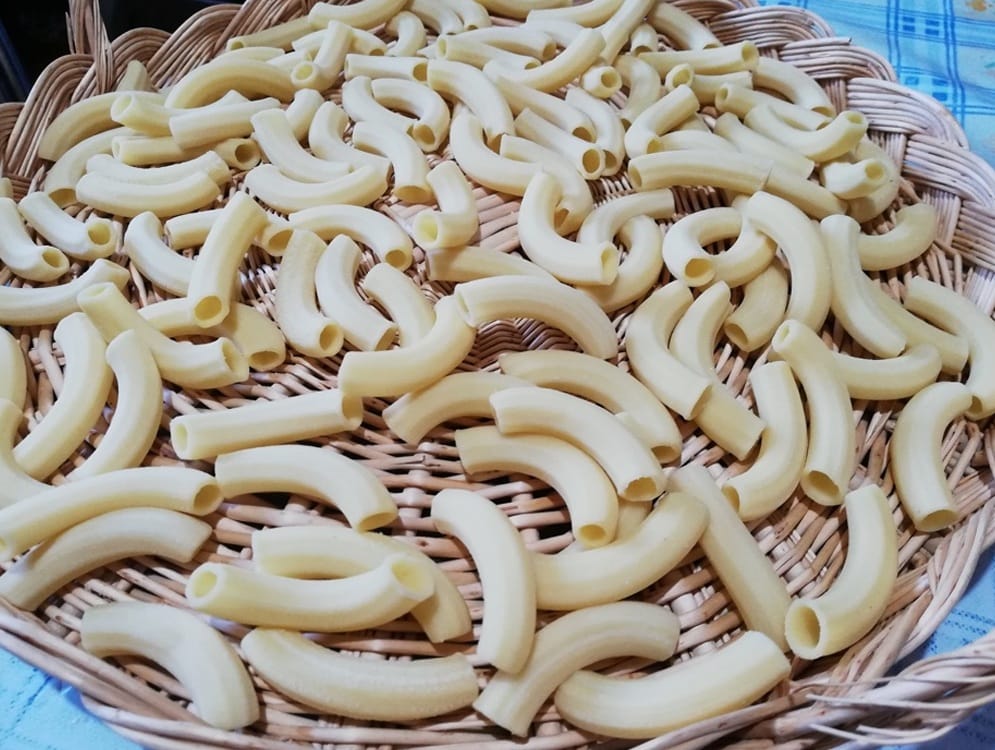
🍝 Recipe for Ridged Mezze Maniche with Philips Pasta Maker Avance
🧂 Ingredients for 4 servings
400 g of durum wheat semolina (non-re-milled is recommended for best results)
150 ml total liquid, including:
💧 Water as needed
🫒 5 ml extra virgin olive oil
🛠️ Preparation
🔧 1. Install the die
Insert the bronze ridged mezze maniche die into your Philips Pasta Maker Avance.
🥣 2. Kneading
Pour the semolina into the mixing container.
Start the pasta program.
Gradually add the well-mixed liquids (water + oil).
🔁 3. Kneading cycles
At the extrusion beep, turn off the machine.
Turn it back on and hold the start button for a few seconds to restart the program.
Repeat for a total of 3 kneading cycles.
🍝 4. Extrusion and cutting
The pasta forms well from the beginning, but to ensure quality:
reinsert the first pieces into the container
continue extrusion until the dough is finished
cut the pasta slightly shorter than a pacchero
🧺 5. Drying
Place the mezze maniche vertically on a drying rack to help them keep their shape.
✅ Final Result Firm, ridged mezze maniche that hold sauces beautifully — perfect with vegetables, mussels, or creamy condiments.
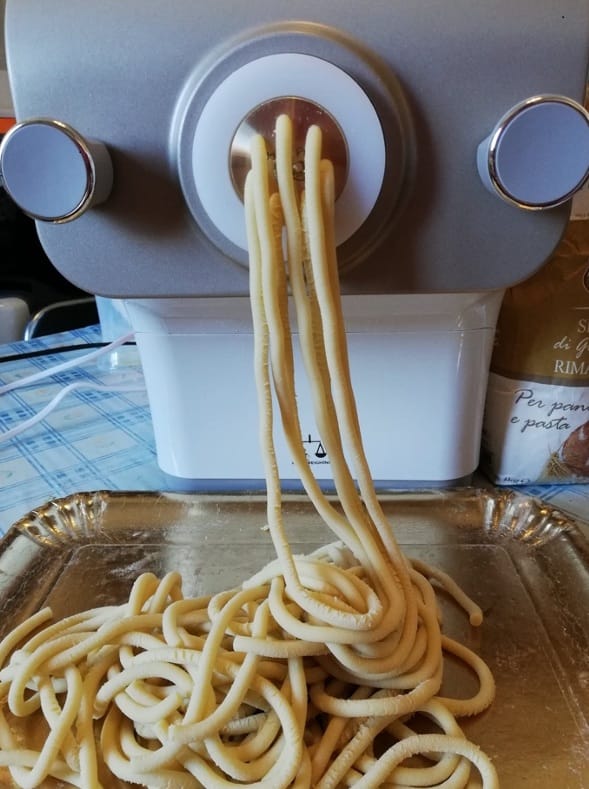
🍝 Spaghetti alla Chitarra Recipe with Philips Pasta Maker Avance
🧂 Ingredients for 4 servings
300 g of durum wheat semolina (re-milled or not, any brand)
2 eggs
Water up to a total of 135 ml, including:
🫒 5 ml of extra virgin olive oil
🛠️ Preparation
🔧 1. Die setup Insert the spaghetti alla chitarra die into the insert holder and attach it to the machine.
🥣 2. Dough preparation
Pour the semolina into the mixing container.
Start the program.
Slowly add the well-mixed liquids (eggs, water, oil).
🔁 3. Kneading cycles
When you hear the extrusion beep, turn off the machine.
Turn it back on and hold the start button for a few seconds to restart kneading.
Repeat this process for a total of 3 kneading cycles.
🍝 4. Extrusion
Begin extrusion. If the first strands are uneven, return them to the container.
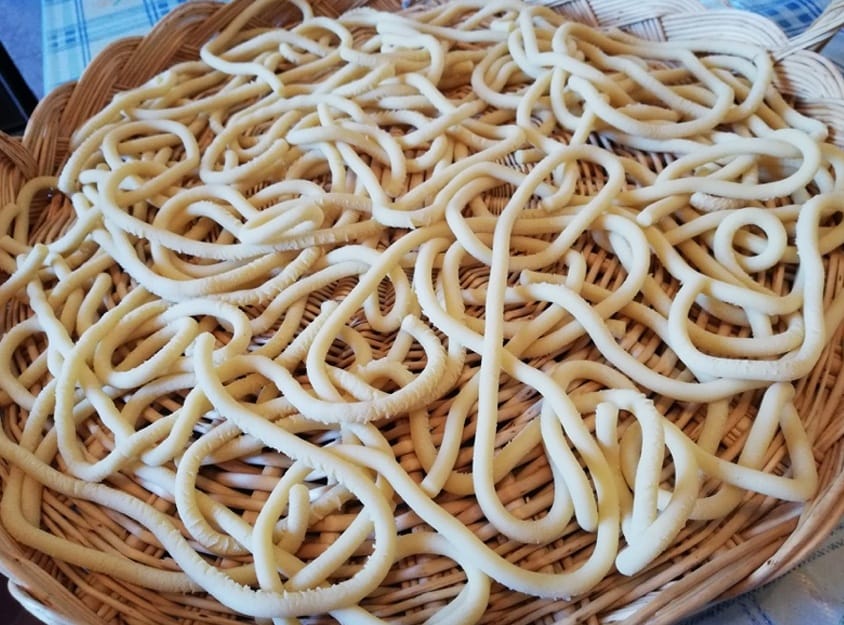
Cut the pasta to your desired length.
Place the spaghetti alla chitarra on a drying rack.
✅ Final result
You’ll get firm, thick spaghetti alla chitarra that hold up well to hearty sauces. Due to their thickness, they require longer cooking times, especially if dried.
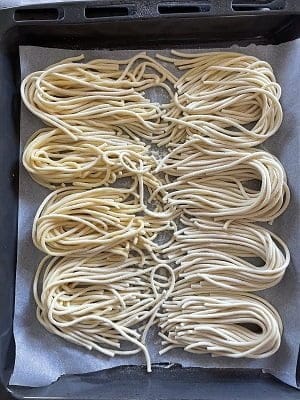
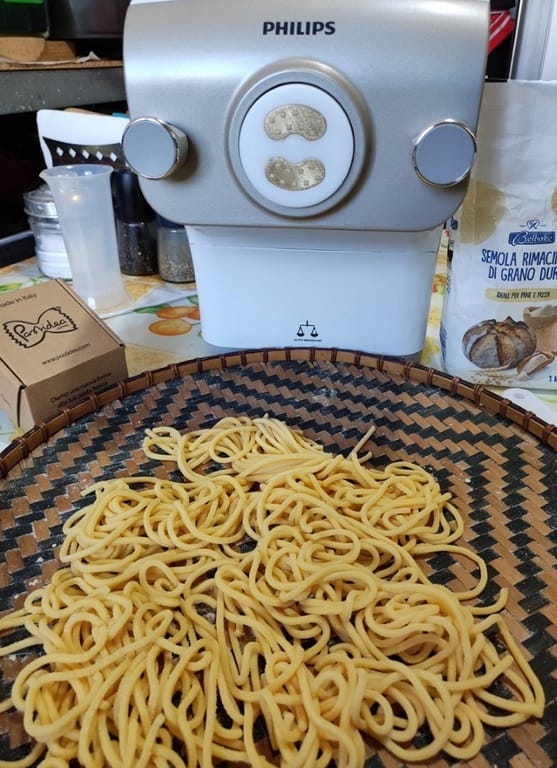
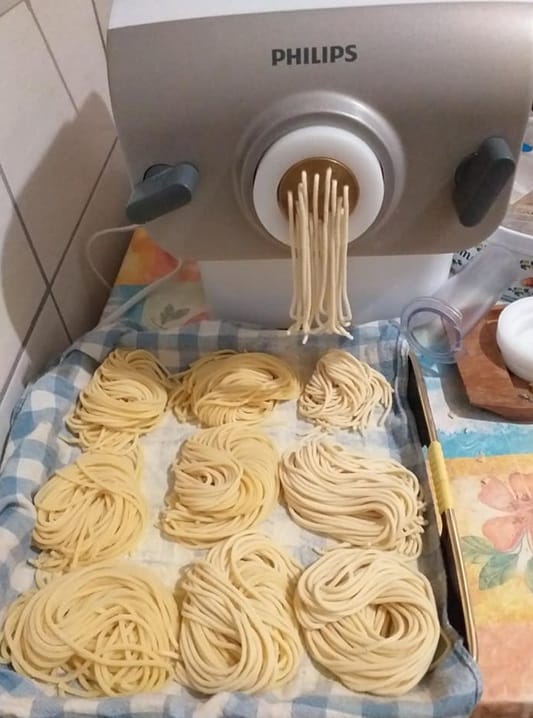
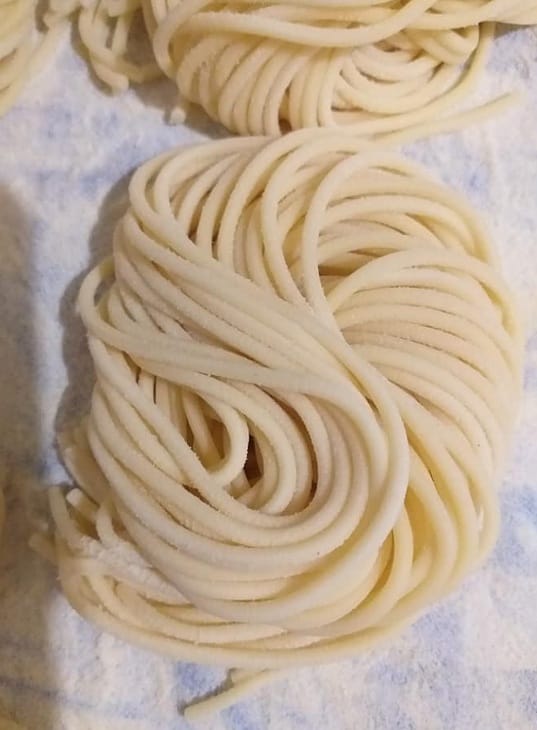
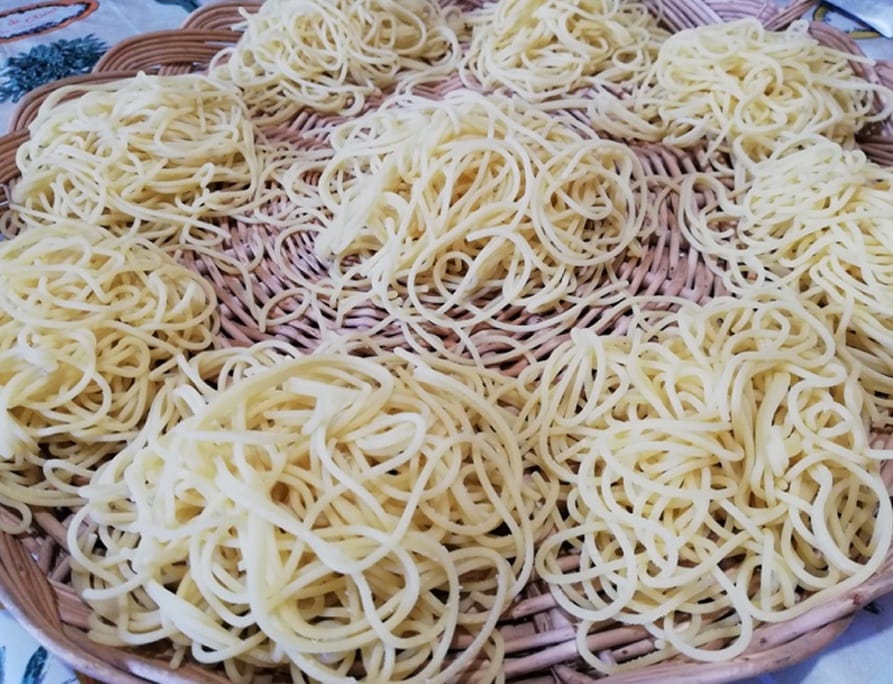
🍝 Spaghetti 2 mm Recipe with Philips Pasta Maker Avance
🧂 Ingredients
400 g of re-milled durum wheat semolina (any brand)
Approx. 152 ml of water
🛠️ Step-by-step Procedure
🥣 1. First kneading cycle
Pour the semolina into the mixing container.
Slowly add the water.
Start the kneading program.
🔁 2. When you hear the extrusion beep:
Turn off the machine.
Restart it for the second kneading cycle.
When the next beep sounds, repeat the step for a third and final kneading cycle. 📌 Note: You may need to hold down the start button for a few seconds or press it again. This is normal.
⏸️ 3. Dough resting
Before the third extrusion beep, turn off the machine.
Let the dough rest and hydrate for 15 minutes in the mixing container.
➡️ 4. Final extrusion
Turn the machine back on.
Press the extrusion button ➡️ (the one on the right with the curved arrow and plus sign).
✅ Final Result
Smooth and well-hydrated 2 mm spaghetti, ideal for any kind of sauce!
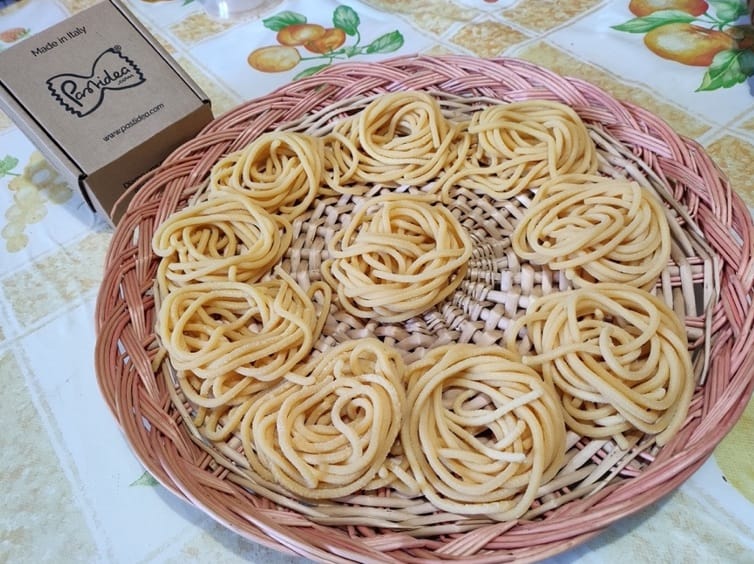
🍝 Spaghetti 1.6 mm Recipe with Philips Pasta Maker Avance
🧂 Ingredients for 6 servings
500 g of re-milled durum wheat semolina (any brand)
200 ml of total liquid:
190 ml of water
10 ml of extra virgin olive oil
🛠️ Preparation
🔧 1. Attach the die Insert the spaghetti die into your Philips Pasta Maker Avance.
🥣 2. Dough preparation
Pour the semolina into the mixing container.
Start the program and slowly add the liquids (water + oil).
🔁 3. Recommended second kneading
When the extrusion beep sounds, turn off the machine.
Turn it back on and hold the start button for a few seconds to restart the kneading program.
This step can be repeated to achieve smoother, more elastic pasta.
🍝 4. Extrusion
Extrude the dough completely.
If the first spaghetti strands are imperfect, return them to the container and continue.
✂️ 5. Cutting and drying
Cut the spaghetti to your desired length (medium-long recommended).
Lay them on a drying rack or tray, spaced out.
✅ Final Result
Perfect spaghetti with a smooth, consistent texture—ideal for any type of sauce: tomato, ragù, pesto, or creative variations.
🍽️ Spätzli Recipe with Philips Pasta Maker Avance
🧂 Ingredients
500 g of durum wheat semolina (any brand)
2 eggs, water and 10 ml of extra virgin olive oil to reach a total of 200 ml of liquid
🛠️ Preparation
🔧 Attach the die Insert the Spätzli die into your Philips Pasta Maker.
🥣 Dough preparation
Pour the semolina into the mixing container.
Start the kneading program.
Slowly add the liquids (eggs, water, oil) while the machine is mixing.
🔁 Repeat kneading cycle When the extrusion beep sounds:
Turn off the machine
Turn it back on and hold down the start button for a few seconds
The kneading program will restart ➡️ Tip: Repeat this step at least once for better dough consistency.
🍝 Extrusion and cutting
Start the extrusion.
If the first Spätzli are not perfect, put them back into the container.
Cut them to the desired length.
Lay them on a drying rack to rest slightly.
🍝 Tasty and Quick Recipe for Tortiglioni with Philips Pasta Maker Avance – Only 2 Ingredients
500 g of re-milled durum wheat semolina (brand of your choice)
190 ml of water, including 10 ml of extra virgin olive oil
🛠️ Preparation
🔧 Install the die Insert the tortiglioni die into your Philips Pasta Maker.
🥣 Dough preparation
Pour the semolina into the mixing container.
Start the program and slowly pour in the liquids.
When the machine emits the extrusion beep, turn it off.
Turn it back on and hold down the start button for a few seconds to restart kneading. ➡️ Tip: Repeat this kneading cycle three times for the best dough consistency.
🍝 Extrusion
Begin extrusion.
Cut the tortiglioni to your desired length (medium or short).
Place them on a drying rack to rest slightly.
✅ Result Perfectly shaped tortiglioni, ready to be paired with your favorite sauce!
🍜 Creative and Light Recipe for Oriental-Style Udon-Pici with Philips Pasta Maker Avance – Only 2 Ingredients
350 g of durum wheat semolina (re-milled or not, any brand)
150 ml of water, including 10 ml of extra virgin olive oil
🛠️ Preparation
🔧 Install the die Insert the udon or pici die into your Philips Pasta Maker.
🥣 Dough preparation
Pour the semolina into the mixing container.
Start the kneading program.
Slowly add the liquids while the machine kneads.
🔁 Kneading cycles
At the first extrusion beep, turn off the machine.
Turn it back on and hold the start button for a few seconds to restart kneading.
Repeat this process for a total of two kneading cycles.
🍝 Extrusion
The first strands may look rough: collect and reinsert them into the container.
Continue extrusion until the dough becomes smooth.
Cut the pasta to your preferred length.
❄️ Storage advice If not using the pasta immediately, freeze it. Avoid drying it completely, as it would require a very long cooking time. Freezing preserves the freshness and allows you to use it like freshly made pasta.
✅ Result Smooth, chewy udon-pici ready to be cooked or stored in the freezer for later.
To provide the best experiences, we use technologies like cookies to store and/or access device information. Consenting to these technologies will allow us to process data such as browsing behavior or unique IDs on this site. Not consenting or withdrawing consent, may adversely affect certain features and functions.
Functional
Always active
The technical storage or access is strictly necessary for the legitimate purpose of enabling the use of a specific service explicitly requested by the subscriber or user, or for the sole purpose of carrying out the transmission of a communication over an electronic communications network.
Preferences
The technical storage or access is necessary for the legitimate purpose of storing preferences that are not requested by the subscriber or user.
Statistics
The technical storage or access that is used exclusively for statistical purposes.The technical storage or access that is used exclusively for anonymous statistical purposes. Without a subpoena, voluntary compliance on the part of your Internet Service Provider, or additional records from a third party, information stored or retrieved for this purpose alone cannot usually be used to identify you.
Marketing
The technical storage or access is required to create user profiles to send advertising, or to track the user on a website or across several websites for similar marketing purposes.